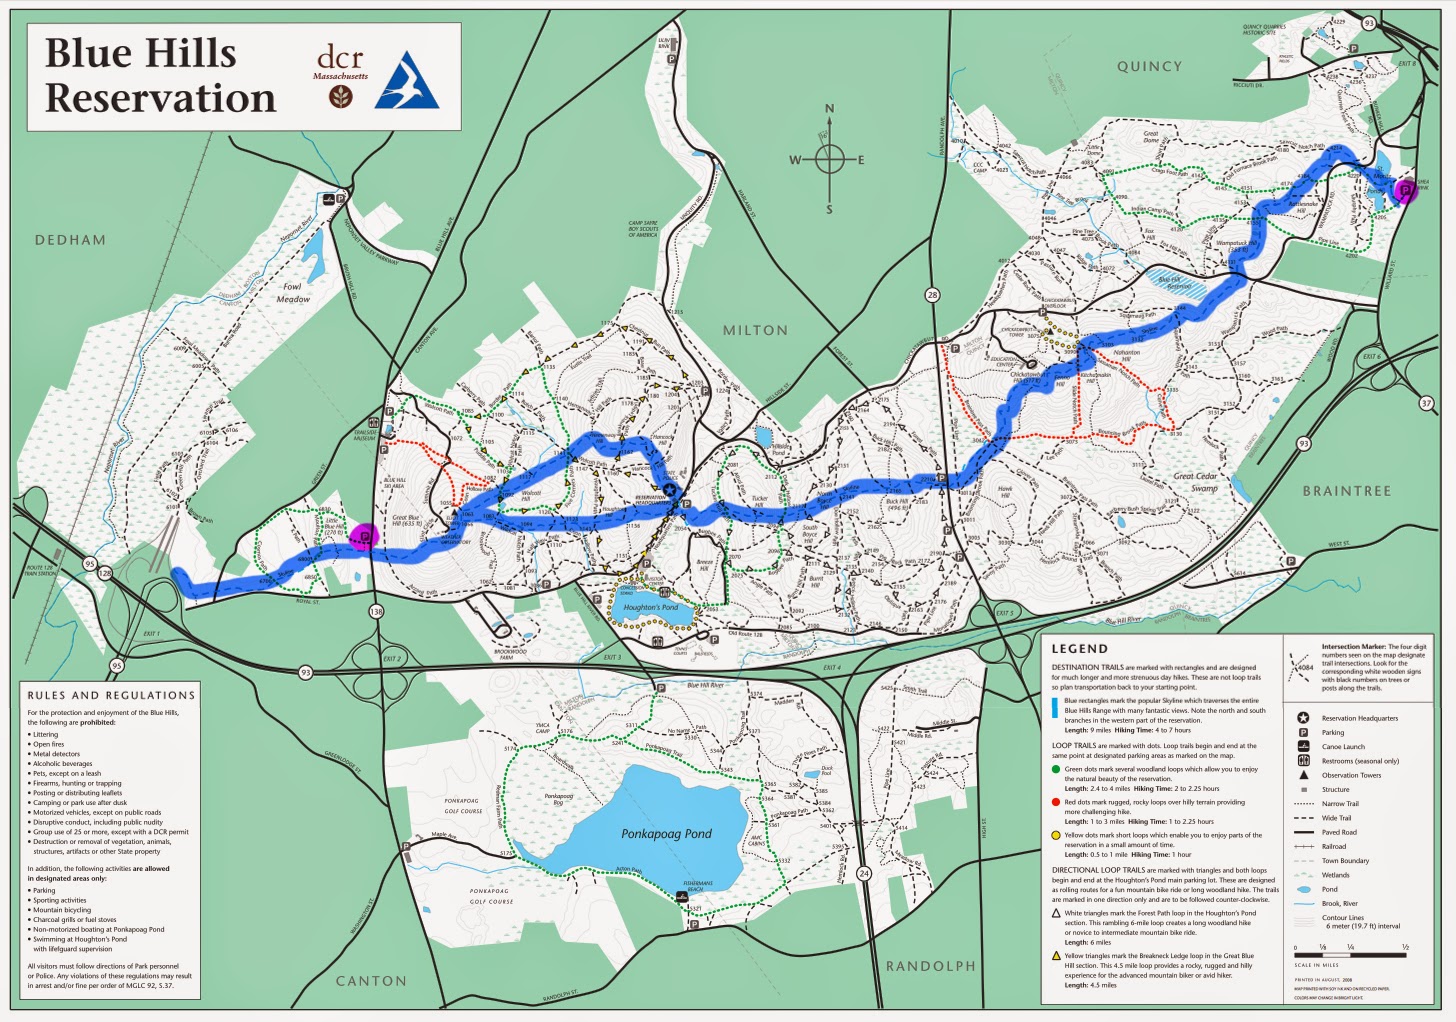
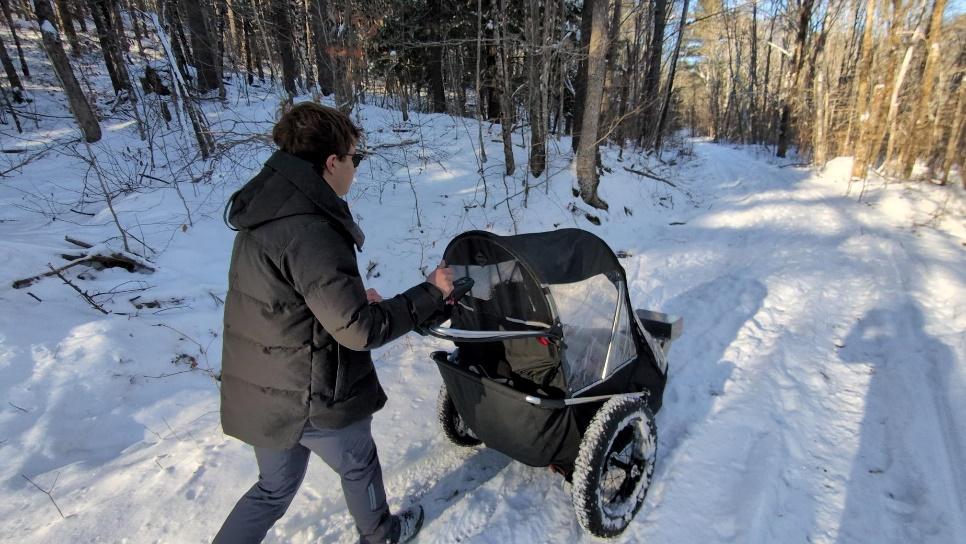
Posts

From our YouTube Channel

Loading...

On Snow, On Pavement, On Gravel, and On Sand

Image
Snow Kit and Component Enhancements To address the challenges of snowy terrain, we introduced a snow kit . This involved adding extra spacer pads, which allowed the cog fixed to the wheel to properly align the chain with the motor, ensuring smooth operation even in icy conditions. Additionally, we replaced the axles, which proved to be a successful upgrade—they didn’t bend or flex under pressure, offering greater durability and stability on uneven surfaces. The fat tires performed excellently in the snow, providing good traction without producing significant noise. These tires handled the slippery, snow-covered trails of Hidden Valley with ease, making them an ideal choice for winter conditions. Juria Tested in Extreme Conditions: Insights and Future Enhancements The Juria device was recently tested across a range of environments, from the freezing trails of Tallman Mountain State Park to snowy conditions in Hidden Valley, Maine, and the urban landscape of Central Park. These tests he...

Off-road Assembly

Image
How to assemble and install Fat Tires: I recommend purchasing a fat bike with complete wheel assembly and a tire hub with spokes. It’s not cheap and will cost a bit more but it will save a lot of time. https://www.amazon.com/dp/B0C8CQSHG3?ref=ppx_yo2ov_dt_b_fed_asin_t 1. This wheel assembly comes complete with an axle, however, the axle is 10mm in diameter and it’s too short. To install it on a Wike you will need a longer a 12mm axle that is 220mm long (most bike parts are specked in metric units of measure). Once you remove the existing axle you will also need to remove the ball bearing that are in there since they are 10mm x 26mm x 8mm W. The bearing we will need must be 12mm x 26mm x 8mm (9mm will also work) to accommodate the 12mm axle. The bearings that are in the hub are hard to remove so you will need to hammer . 2. The axle that I found to work best is the Minho 12mm 230mm Front Rear Axle it comes with three bushings and the end bolt. We will need four of the 5mm bushings a...

Fundraiser Thank You

Image
I recently held a heartwarming fundraising party to support the further development of the Juria. The event featured a live band, speeches, and an auction of unique items donated by my close family members. With the community's generous contributions, I raised over $7,000, bringing the innovative adaptive stroller closer to reality and highlighting the power of collaboration in transforming lives. Moving forward, we plan to work on further designs of the Juria. I also plan to build another Juria which can be donated to an individual in need in my surrounding community. Thank you so much to everyone who attended and to all the generous donors. I am so grateful for the opportunity to make the Juria possible. 

Wireless Joystick

Image
While the joystick offers precise control, it requires skill to operate effectively, particularly in tight spaces. The sensitivity makes it challenging for beginners, with small inputs potentially causing large movements, demanding practice for accurate handling.

Reinforced Rails, Handlebar with Joystick, Swivel Wheel with Better Tread

Image
Reinforced rails with gussets  The rails now have gussets on both sides for added strength and stability, which should help the frame withstand more stress. Joystick mounted on handlebar for better control  The joystick is now mounted on the handlebar instead of the canopy frame. The previous setup felt too high and wasn’t comfortable for natural, two-handed control. This new position improves safety and grip.  Off-road swivel wheel with improved tread  The original swivel wheel didn’t handle rocks or curbs well. I found a replacement tire with an inner tube with better tread on Amazon - link below. https://www.amazon.com/dp/B08R87DHRL?ref=ppx_yo2ov_dt_b_fed_asin_title

Reinforced Rail Design Needed

Image
We used 1” aluminum square tubing for the rails design that supports the canopy and chassis. During the third test drive on grass (a bumpy surface), both rails broke, but not at the welds, so it doesn’t seem to be a fabrication issue—it looks like they were just overstressed. Switching to 1.5” aluminum tubing would be ideal since it’s almost three times stronger. For now, we're sticking with the 1” tubing and adding gussets on both sides of each rail to reinforce it. The final design will use 1.5” tubing.   Updated rail design - PDF and .dfx file PDF .dfx

Test Drive: Solid Performance with Key Improvements Needed

Image
The Sandbags: 150lbs We tested the Juria by loading 150 lbs of sandbags into the seat to simulate a driver's weight. It handled the extra weight easily, with smooth steering and stable balance, even when the load shifted. This test was done to check its ability to handle real use and identify any design weaknesses. The Joystick The joystick controller which we mounted on top of the canopy, was awkward to use without a handle. We'll explore adding a handlebar and a better placement for the joystick. Promising Start with Room for Improvement The first drive of the Juria went smoothly, handling rough terrain well with extra weight. Stock Wike wheels and tires worked, but more rugged off-road tires would be better for the electric dual drive. The front swivel wheel lacks tread, so we'll find a better off-road option. This setup performs perfectly on paved surfaces.